Connect a source
A source is one of your other systems — the place your customer data already lives. Connecting a source lets Pulse pull that data in automatically, so it can be united into customer profiles and used to build audiences. You can connect a SaaS tool, a streaming feed, an HTTP API, or simply upload a file.
This guide walks you through connecting your first source and getting data flowing.
Before you start
Your data lands in a dataset. It helps to have a schema ready so Pulse knows the shape of your data — see Create a schema — but you can also let Pulse land your records and describe them afterward.
Open the Sources screen
- Sign in to Pulse at pulse.azothedge.com.
- In the left navigation, under Ingestion, select Sources.
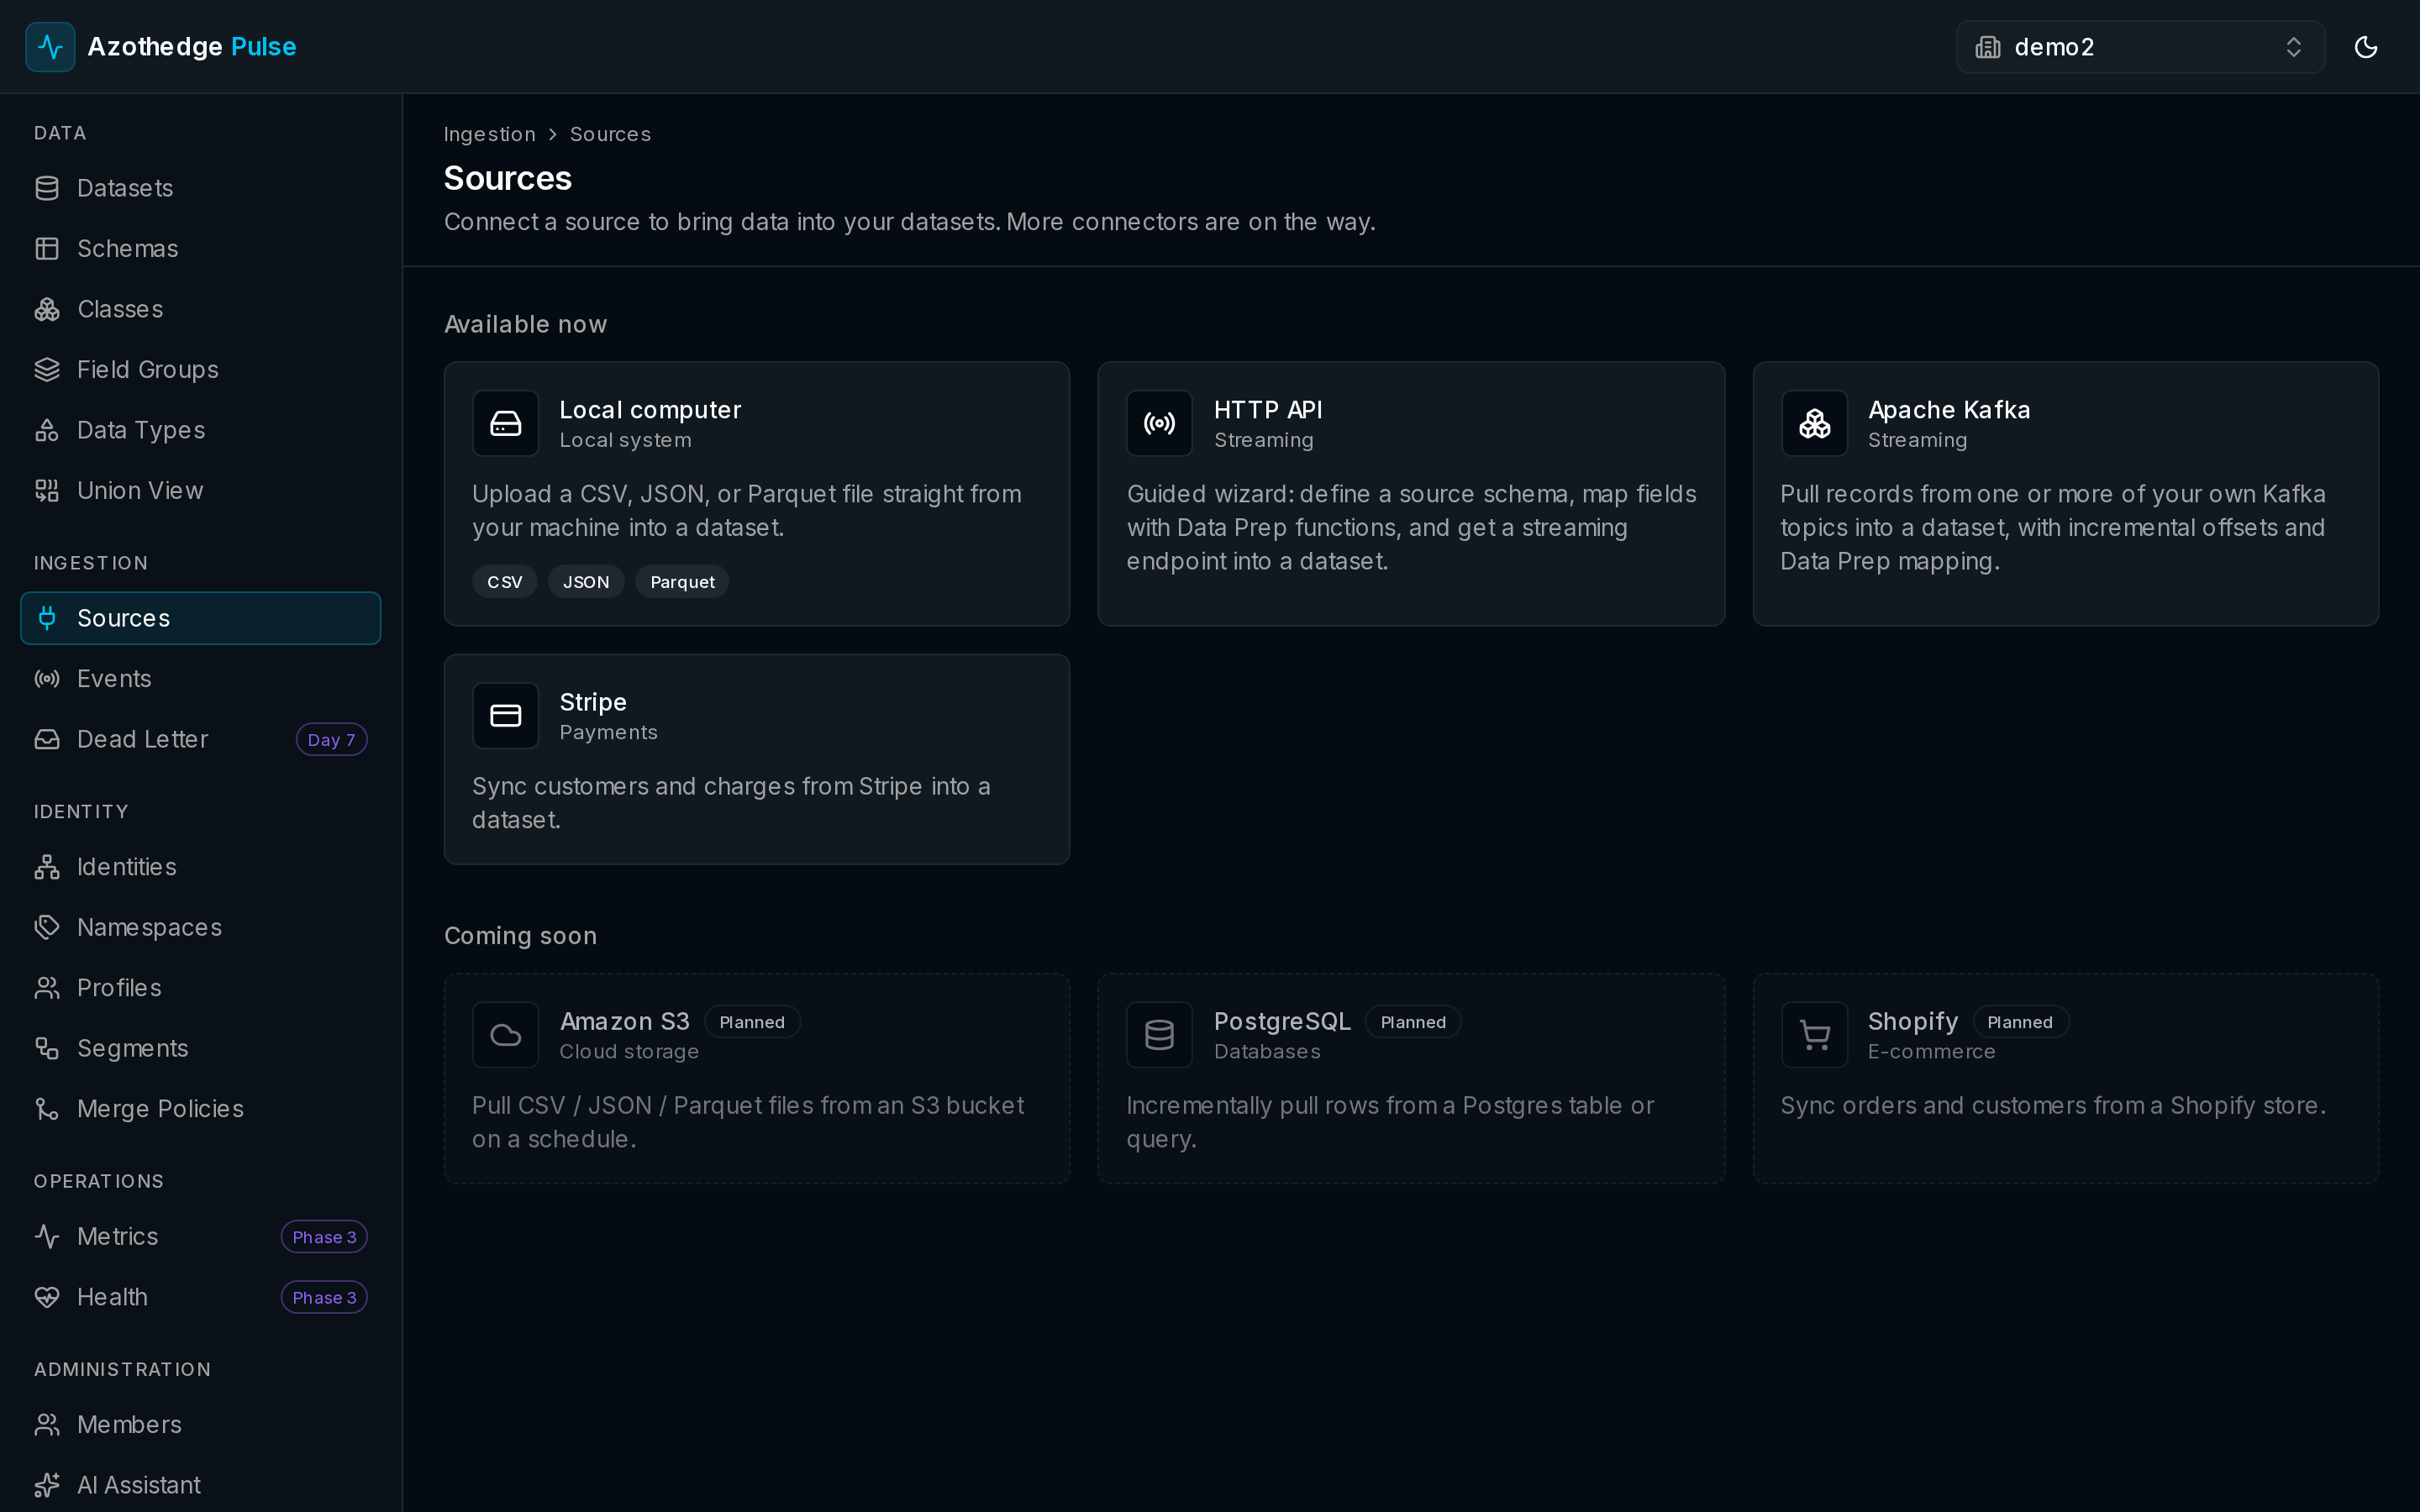
- You'll see the catalog of connectors you can choose from.
Choose a connector
Pick the connector that matches where your data lives:
- Stripe — bring in customers and charges from your payments platform.
- Apache Kafka — connect a streaming feed of real-time events.
- HTTP API — pull records from a web service that Pulse can call.
- Local file — upload a file (CSV, JSON, or similar) straight from your computer.
Select the connector you want to start with.
Create and test a connection
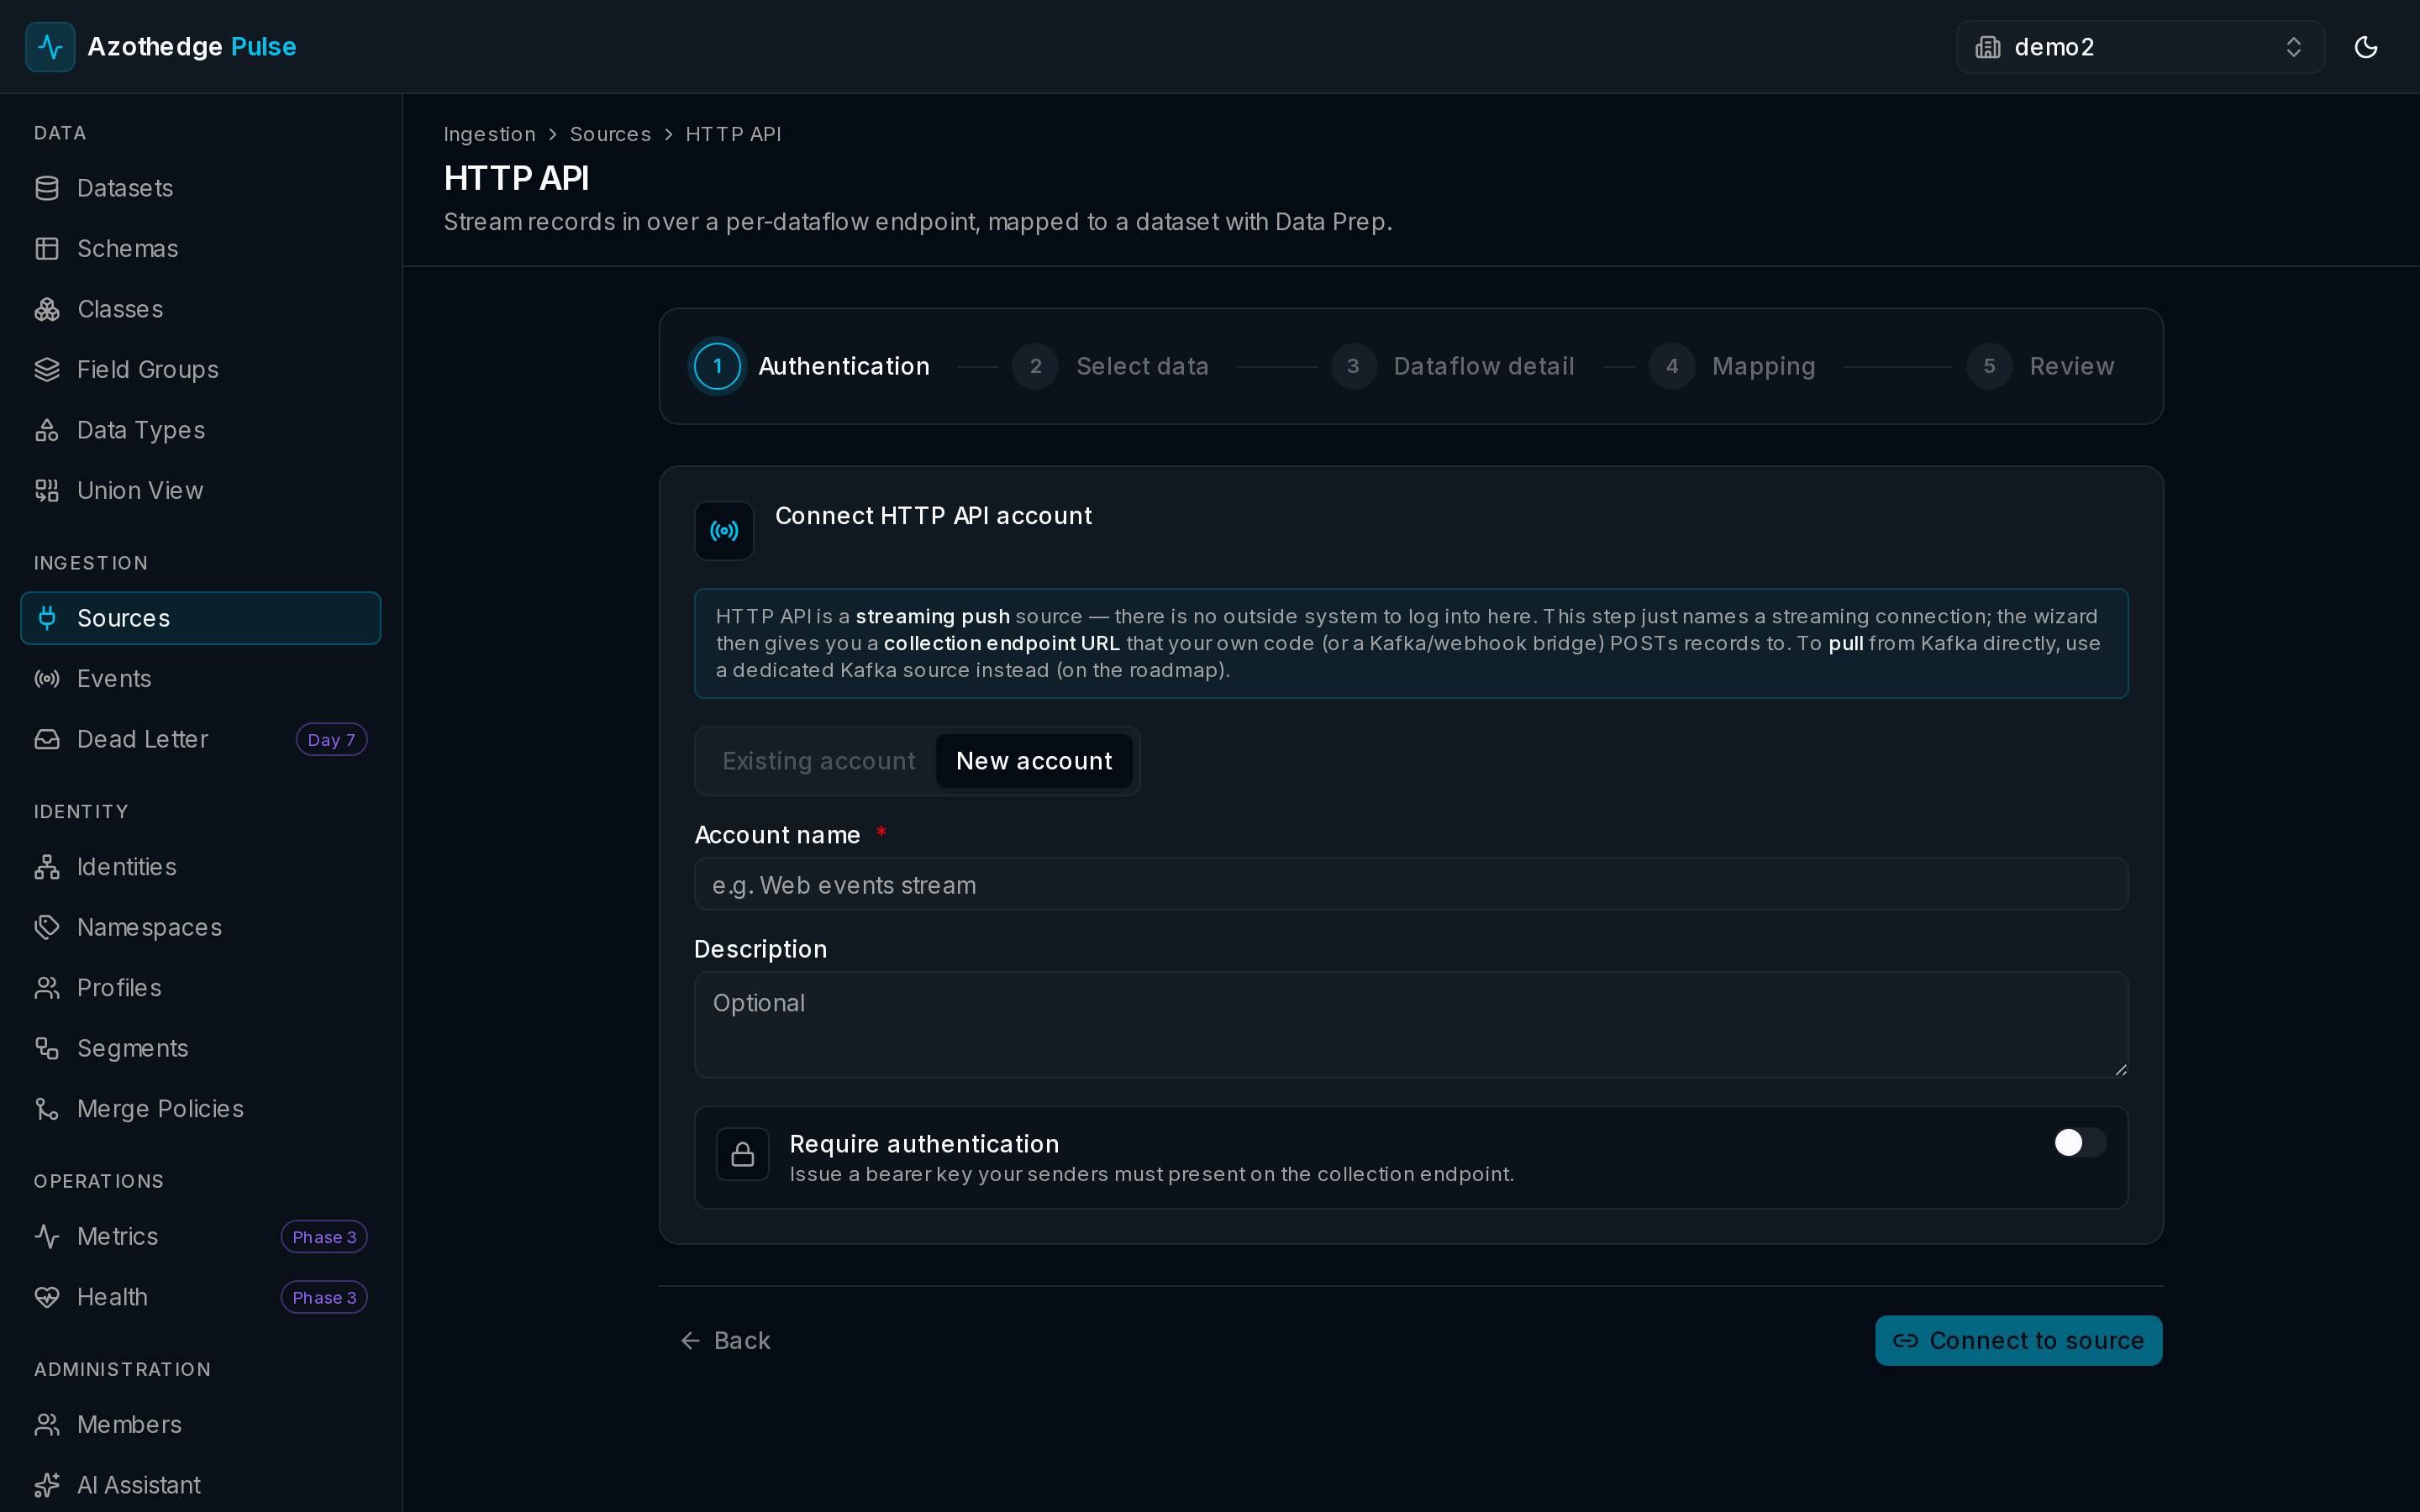
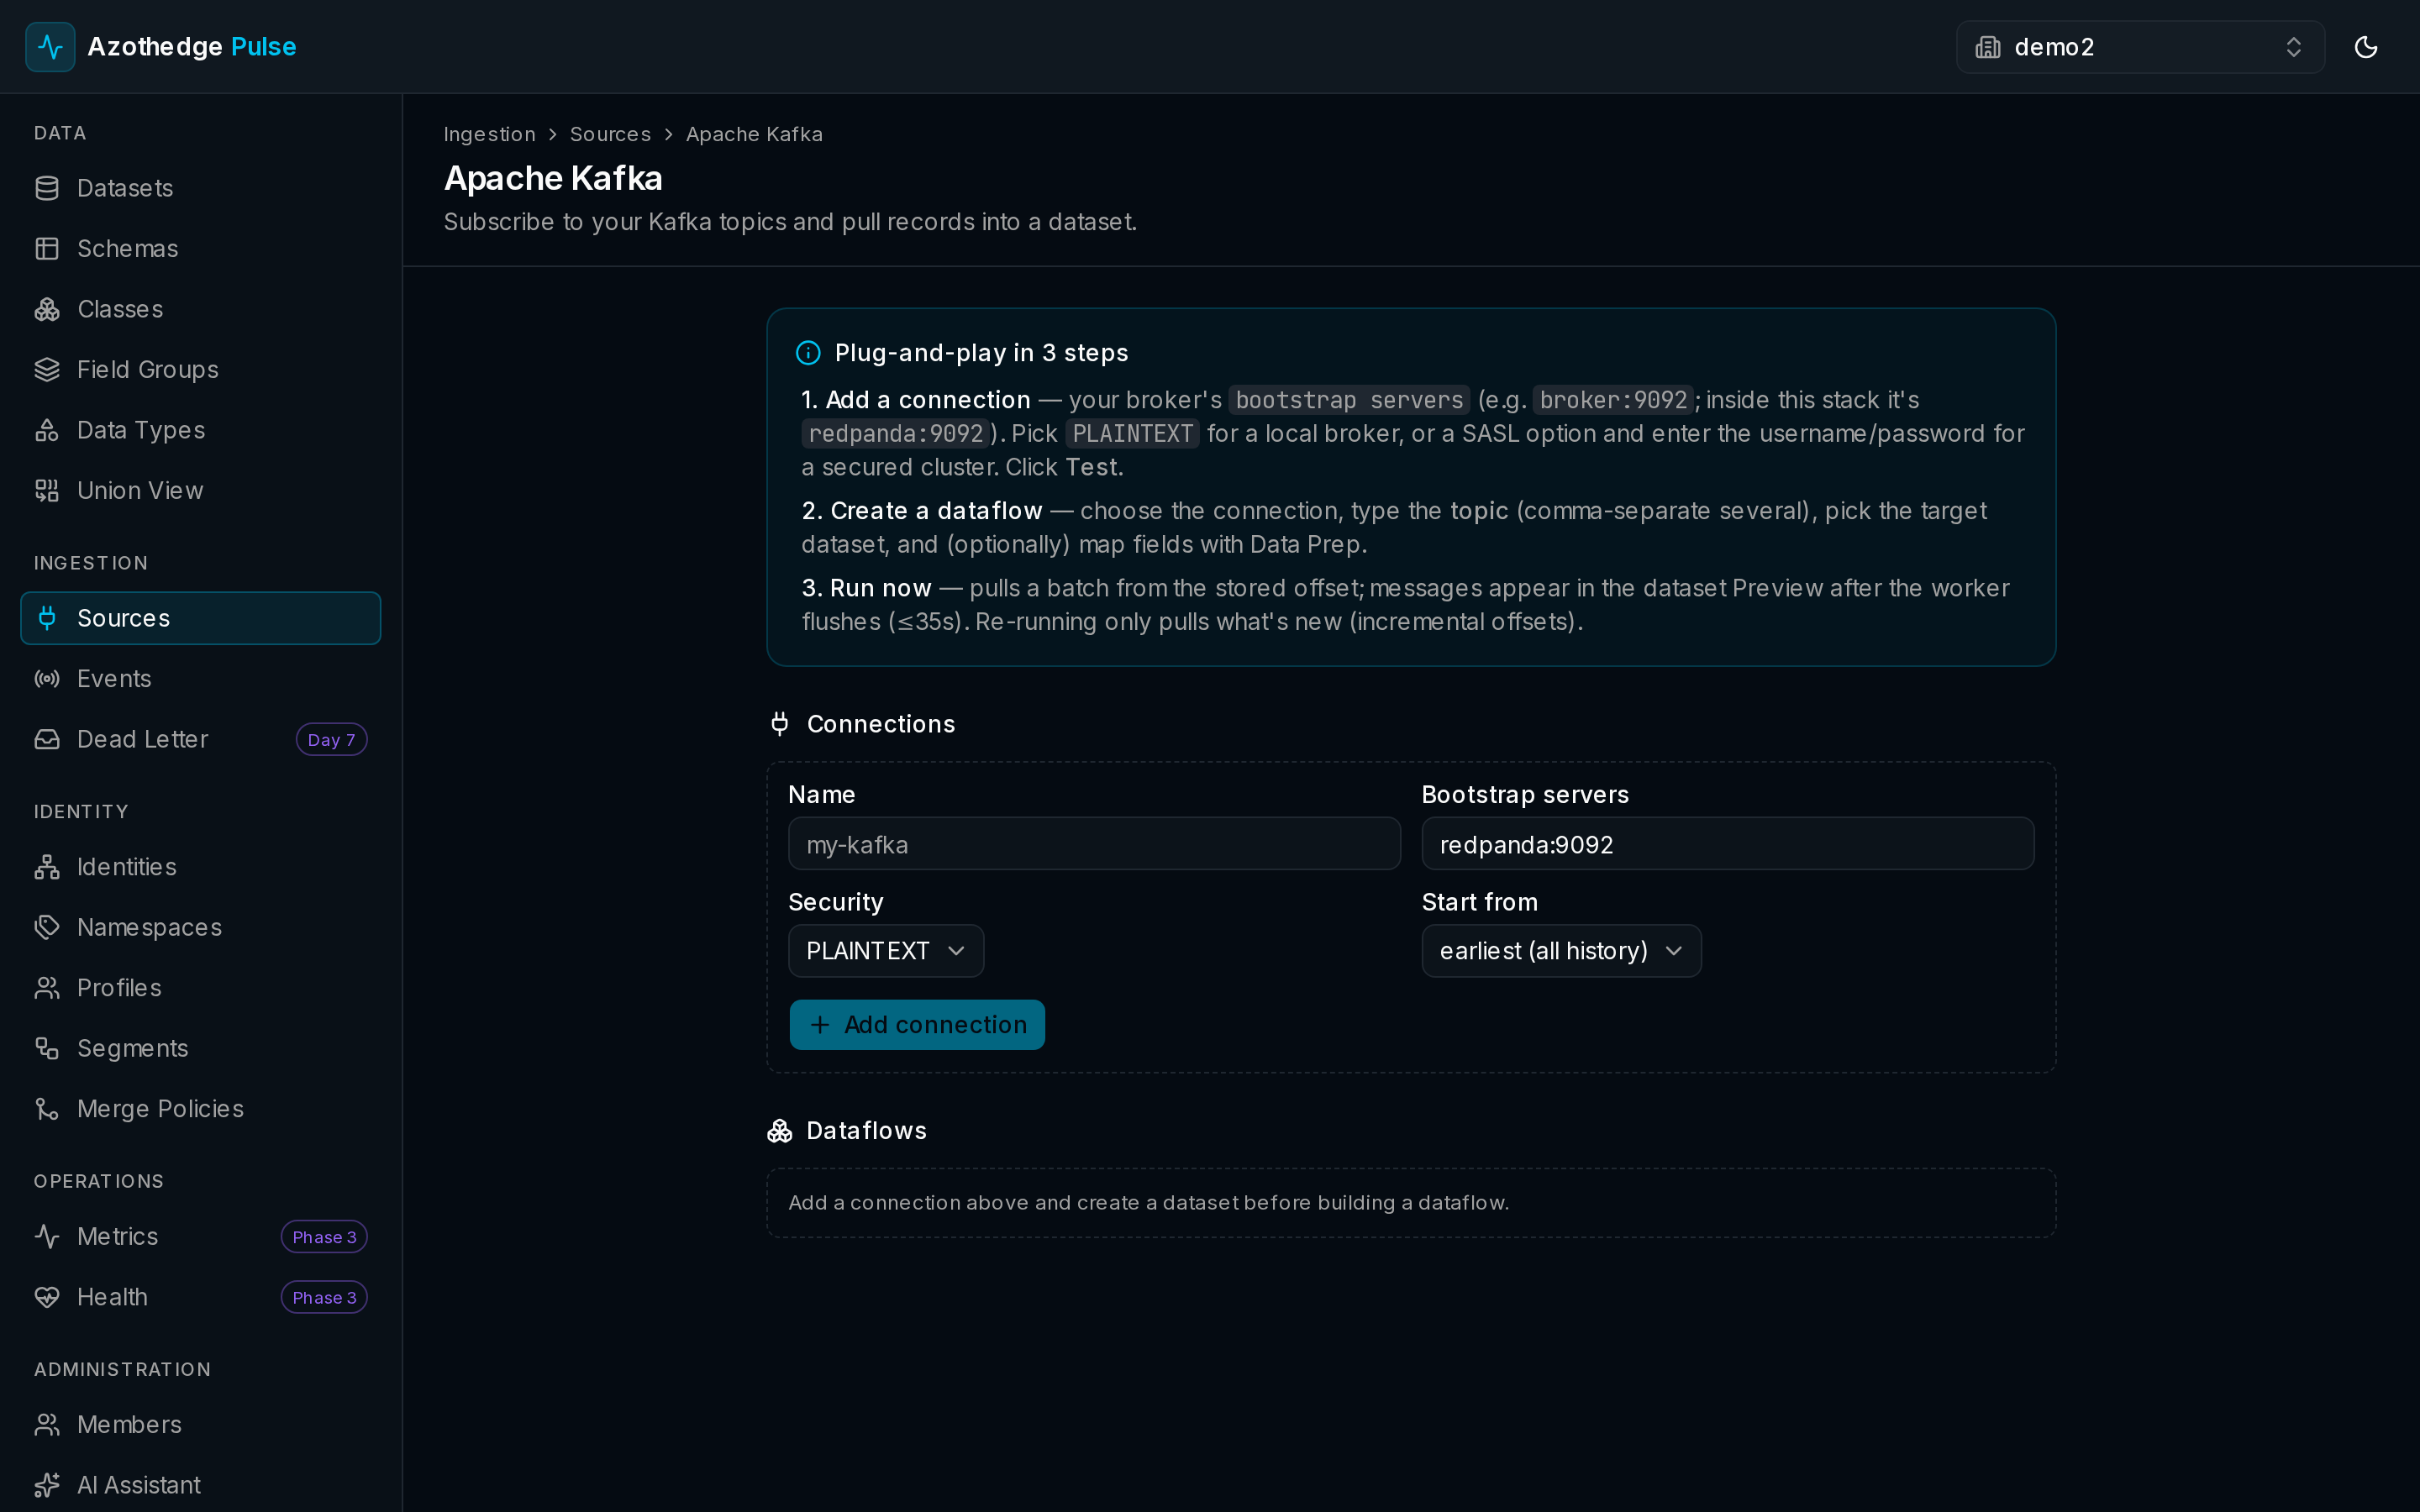
A connection is the saved link to your system — its name and the credentials Pulse uses to reach it.
- Give the connection a clear Name — for example, Production Stripe.
- Enter the details that connector needs (for example, an access key, an endpoint, or sign-in credentials). Pulse stores these securely.
- Select Test to confirm Pulse can reach your system. Fix any details if the test reports a problem.
Keep credentials current
If a credential changes in the other system, update it on the connection here and test again. Everything that relies on the connection will use the new details from then on.
Create a dataflow
A dataflow describes what to pull and where it should land.
- With your connection selected, create a new dataflow.
- Choose the kind of record to bring in — for example, customers or charges.
- Pick the target dataset the records should land in, or create one for them.
- Choose a schedule for how often Pulse pulls the data:
- Manual — only when you run it yourself.
- Hourly — automatically, once an hour.
- Daily — automatically, once a day.
Preview before you commit
Select Sample to pull a few records and preview them. It's the quickest way to confirm you're bringing in the right data, mapped the way you expect.
Run it and check the results
- Select Run to pull data right away.
- Open the dataflow's run history to see each run — when it ran, how many records were fetched, and how many were accepted.
- If records were rejected, the history points you to the reason so you can adjust and run again.
From here your data lands in its dataset, and — once that dataset is enabled for unified profile — starts building customer profiles.
Next steps
-
Manage your datasets
See where your records landed, preview them, and enable them to build profiles.
-
Describe your data
Use a schema to tell Pulse the shape of the data you're bringing in.